Our Favorite Ways To Wrap A Present
If you're anything like us, you might be scrolling through blog after blog trying to find new and cute ways to wrap your Christmas gifts this year. Luckily for you, we put 3 of our favorites into one big blog post so you can follow along with step by step instructions to wrap up the cutest gifts this year. But, before we get into it we wanted to remind you of a few things!
Rabom's Advice:
- Don't forget to heat seal your ribbon edges after cutting!
- Don't be afraid to mix different ribbons and colors!
- You can add a dot of hot glue at the knot of your bow to make sure it doesn't come untied if you're worried about that!
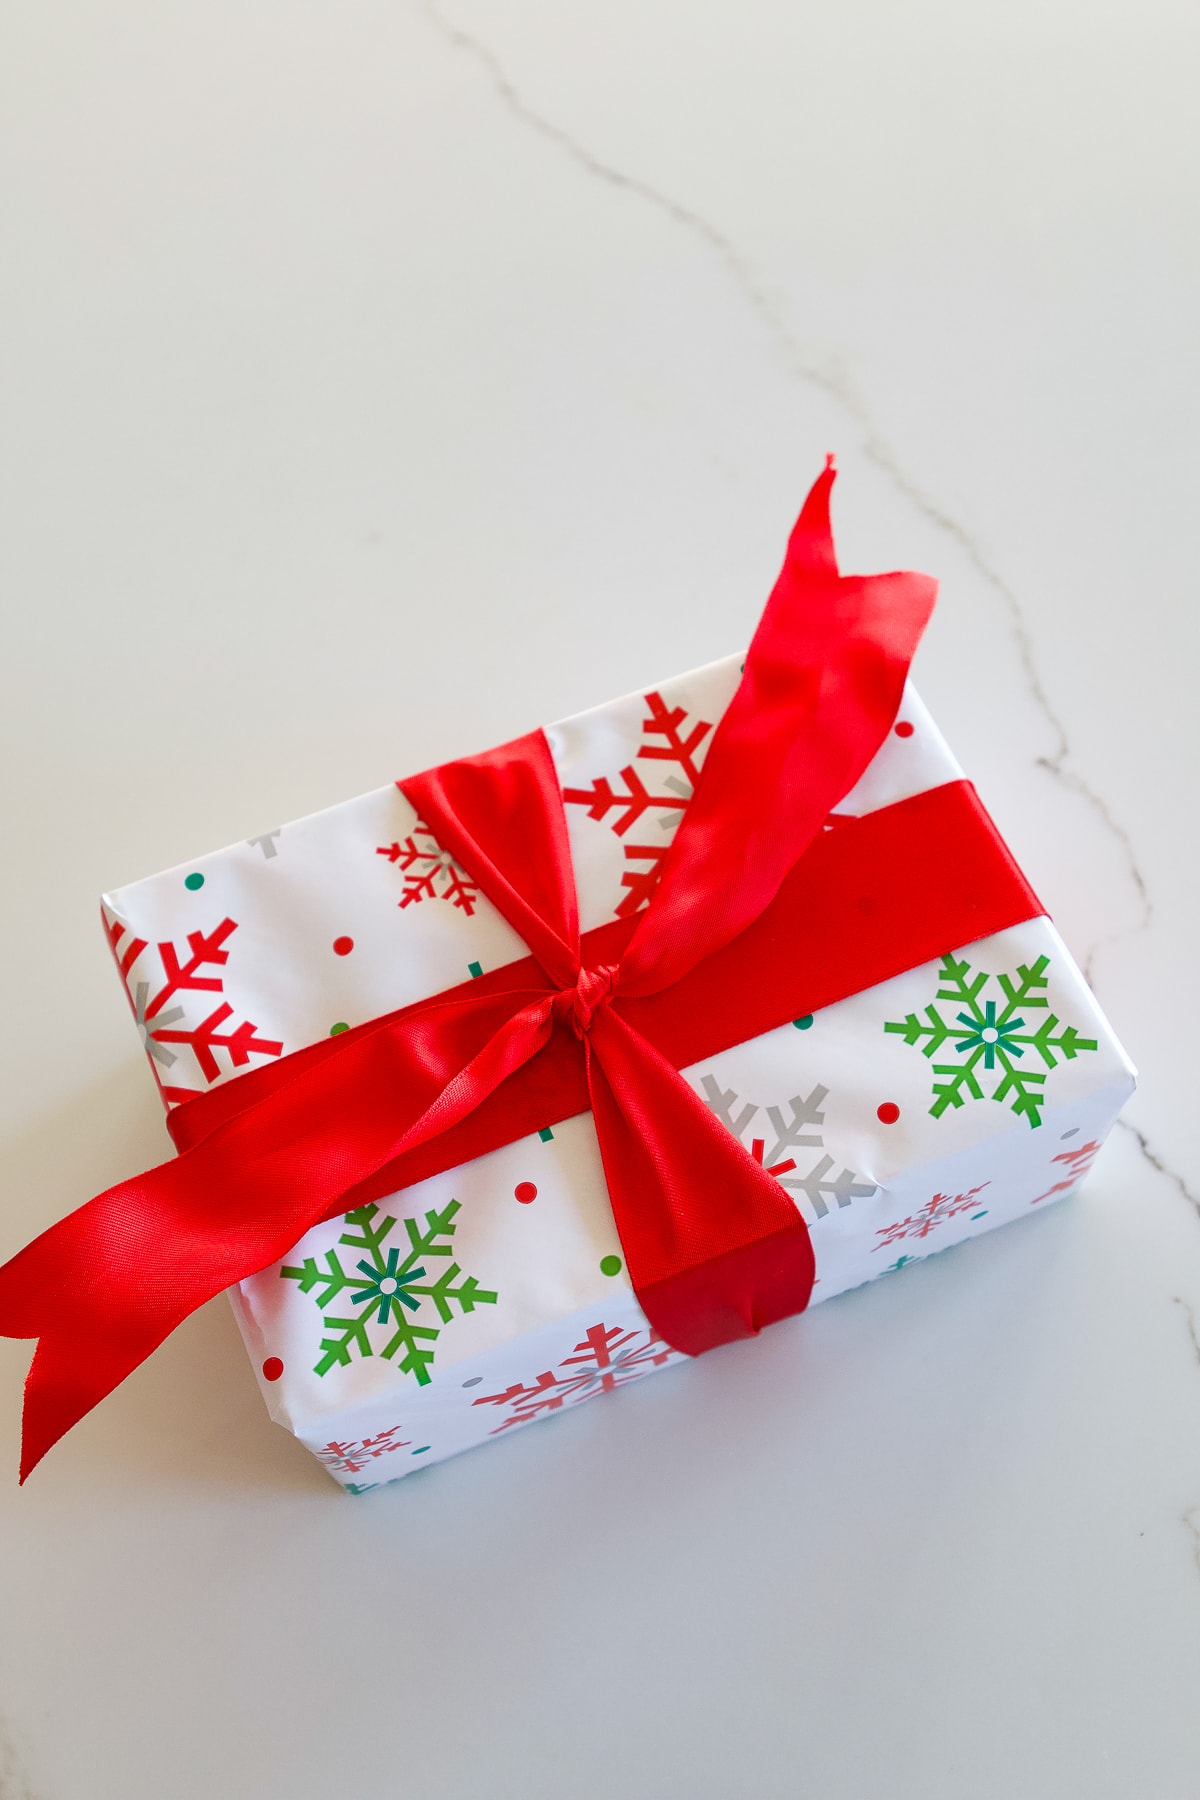
Apartment Therapy Blog
1. Get the right amount of ribbon.
Prep your ribbon by measuring the present you’re wrapping. Get the height by measuring from the base of one end, the length across the top, and the height from the top to the base of the opposite end. Then multiply that by 5 (or 6 if you want to build in some cushion) to get the total length of ribbon you’ll need to tie the bow around the package.

2. Locate the middle of the ribbon.
Find the middle of the ribbon by bringing the two ends together and dividing in half. Place the middle of the ribbon over the center of the package. Be sure the middle of the ribbon stays in the center of the gift as you proceed to the next step.

3. Start wrapping the ribbon around the package.
Fold the ribbon around the edges and bring together at the center of the back side of the package. Then, twist so that you create a cross in the middle of the package.

4. Bring the ribbon back to the front.
Bring the ribbon up and around the edges to the front of the package. Tie the ribbon in a knot under the initial vertical placed ribbon.

5. Tie a knot.
Using the two loose ribbon ends, tie a knot around the vertical ribbon you’d placed at the beginning of the project. You should have a gift that has ribbons on all four sides and a knot in the center of the top face.

6. Tie a bow.
Take the two loose ends and tie in a bow by first bringing up one end in a loop, pinch at the base, and bring the other ribbon around, under, and through the loop. Pull taut.

7. Fluff the bow and snip any excess.
Take some time to fluff up and perfect overall look of the bow, you may need to adjust the loops by tugging on the tails. If you really want to get fancy, clip the tails by folding them in half and trimming at at upward angle.

WRAPSIR
If you're more into video tutorials, we loved this one by WRAPSIR! You can watch it here.

The DIY Playbook
I just unroll some of the ribbon from the spool and wrap it around the gift to get an idea of how much I will need before I cut it. Make sure to pull the ribbon from back to front and front to back. (You will be wrapping the ribbon around the package both horizontally and vertically.)

To get an idea of how much ribbon a normal-sized shirt box requires for this step, I measured it and it was about 7 feet long. Usually, I don’t measure the ribbon. Instead, I just eyeball it and it works, but do whatever feels right to you.

So, go ahead and cut the ribbon and push the spool aside. Whenever I cut the ribbon, I like to fold the ribbon in half and cut it at a 45-degree angle. This results in a nicer end and a more polished look.
Tying the First Knot

Now, you will flip the package over, top-down, and slide the long strand of ribbon under it. Pull on the ends of the ribbon to make sure that they are equal in length.
Bring the ribbon ends toward one another and crisscross it. Flip the package back over so that the top of your gift is up and bring the ribbon together. Simply tie it in a knot at the top of the box, leaving the ends relatively long.
The “base” of the package is done and now you can make the fancy bow!
Starting the Large Bow On Top

Unwind a bunch of the ribbon from the spool and start by making “loops” of equal size on each side, pinching the middle of the ribbon together. The size of that first loop depends on the size of the gift. I usually make the loops of the bow a few inches long.

Pinch it tight and keep adding the same-sized bow loops to each side. I like to have four loops on each side (eight total) to make a nice, big, poufy bow.
Once you have yours to your liking, go ahead and cut the ribbon off the spool.
Attach The Bow To The Base
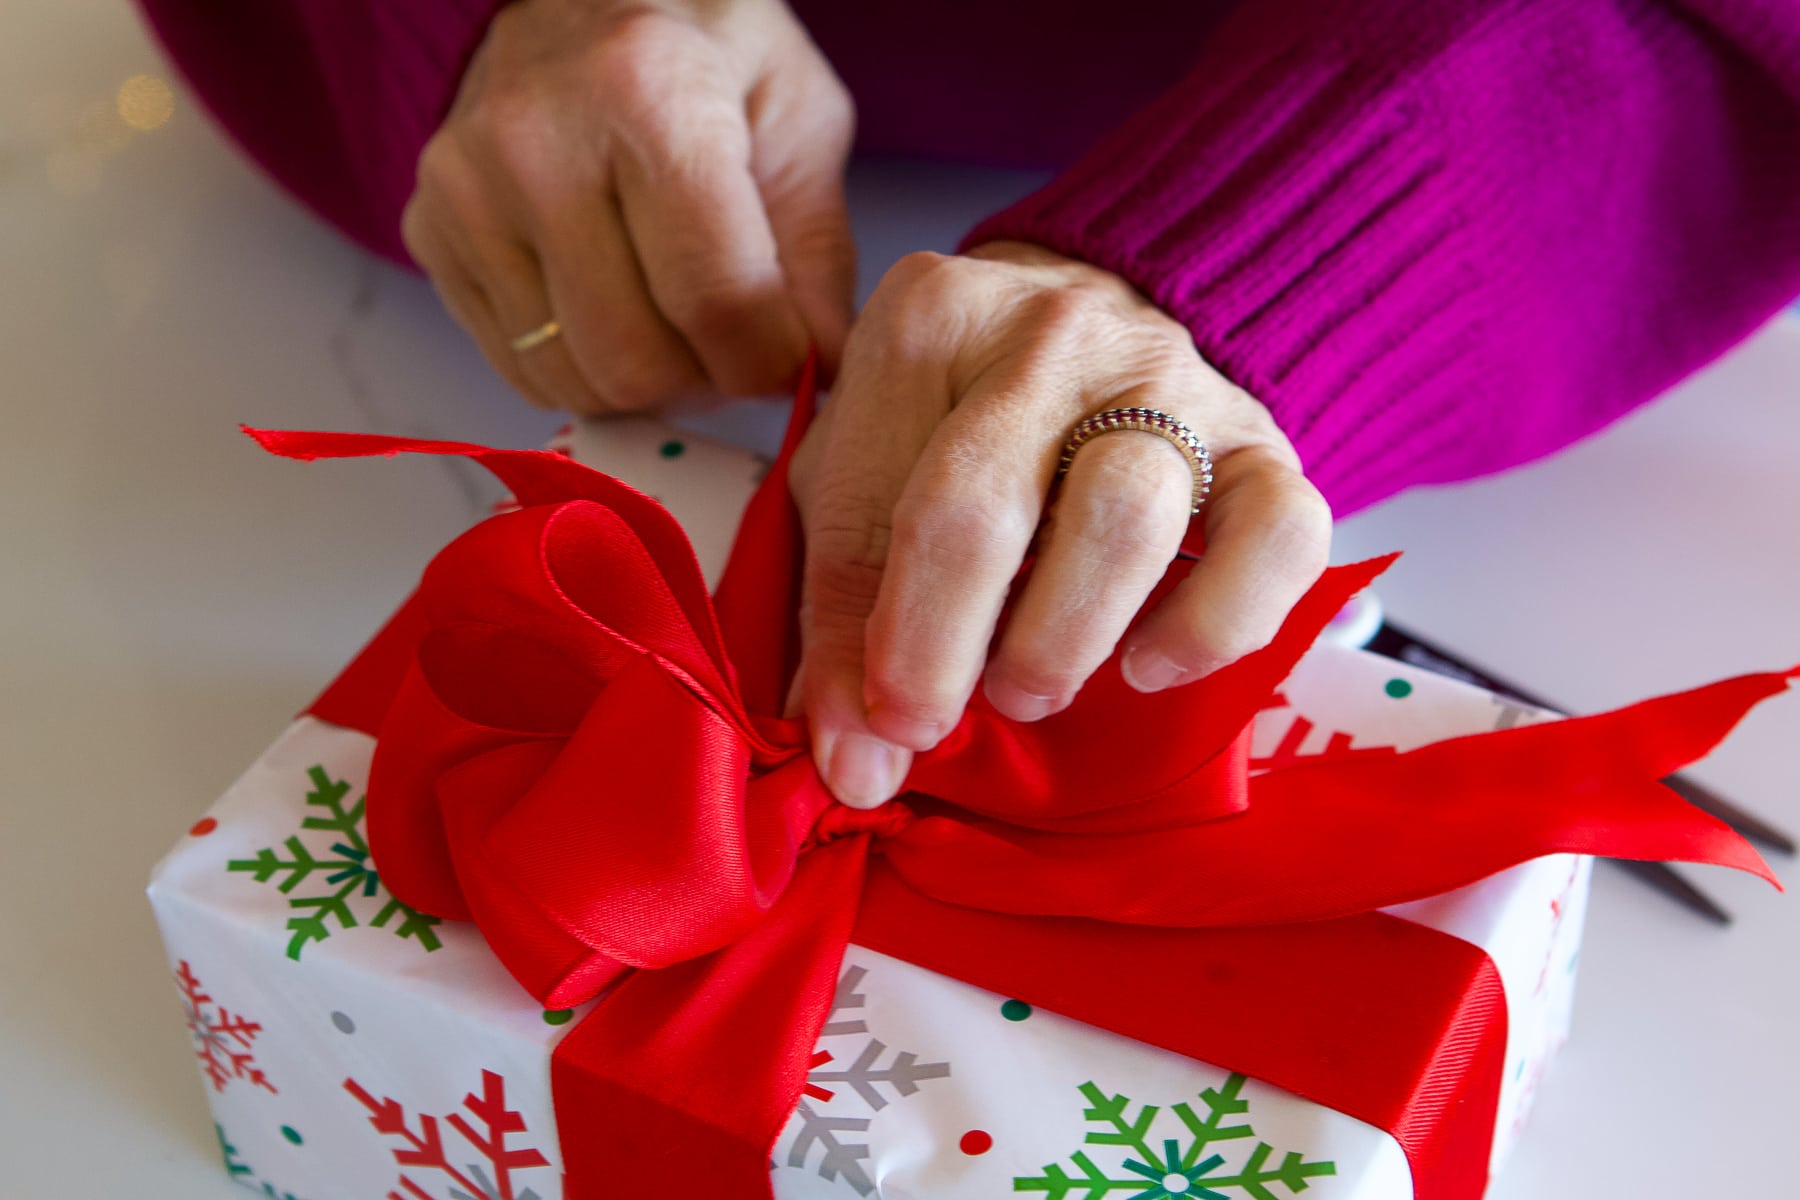
Set down your bow in the center of the box, take the long ends of the “base”, and tie them into a knot in the middle of the package. Then, snip the excess ribbon on the base (cut at an angle) so they’re not too long.
Side Note: It’s tough to keep the ribbon pinched in the middle and tie a knot around it all at the same time and all by yourself. After all, you only have two hands! So, if you are a novice, you might want to ask a helper to tie the knot around the ribbon while you keep the middle pinched nice and tight. I promise, that with some practice you will soon be able to do it all by yourself, so don’t be discouraged if you need a little help in the beginning!
Fluff, Fluff, Fluff!

Now it’s time to fluff!! This is the fun part, if you ask me, and the more you “fluff”, the prettier the bow! You will want to grab each individual loop and pull it out away from the middle. Start at the bottom and pull the bottom loops to each side.
Next, take the loop on top of the bottom one and pull it to the other side. Keep going until all of the loops are pulled away from one another and the bow looks fluffy, poufy, and gorgeous. You can keep fluffing and tweaking until you are happy with your finished bow.